
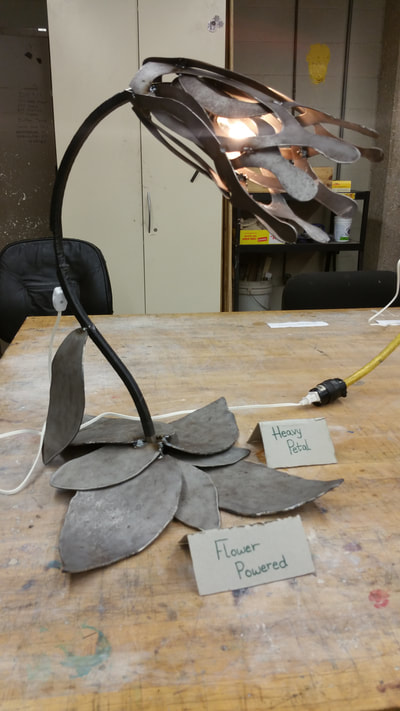
Sculpture Project 1 Light Inspired- "Heavy Petal"
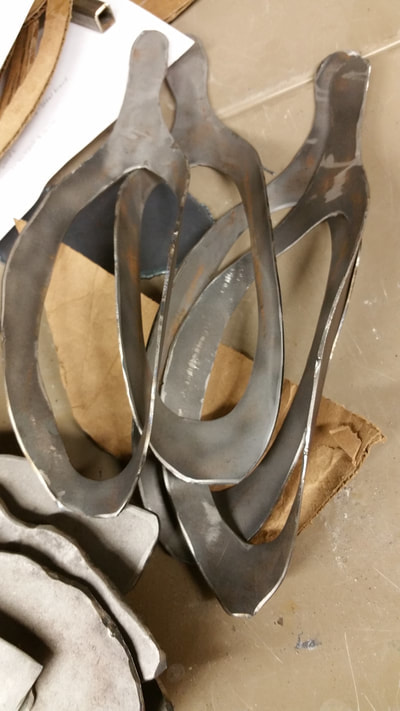
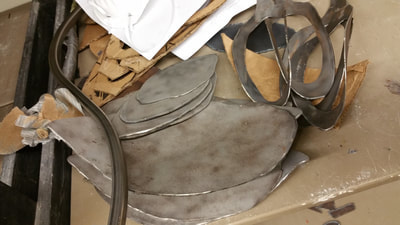
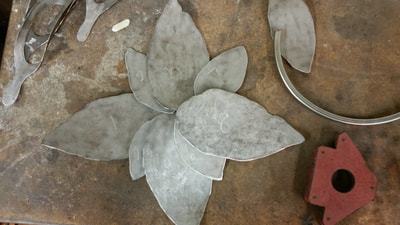
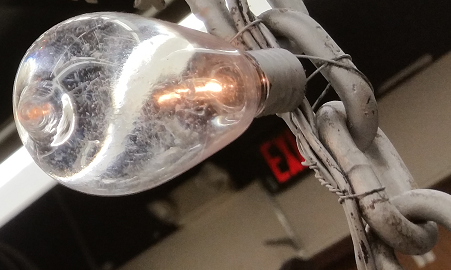
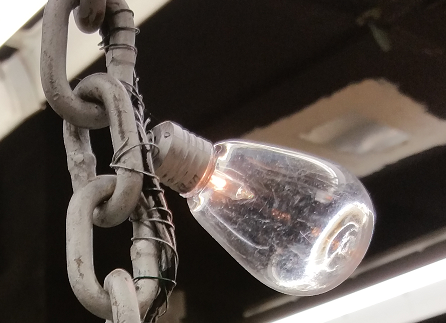
Based on the relief work done by other artists such as Wim Delvoye, I attempted to recreate this effect by layering the petals of the flower. The main obstacle for this piece was managing the massive weight that was rapidly accumulating on top. That's when I devised the large petal base and leaf counter weight. For the stem of the flower, I bent a long hollow square pipe into an "s" shape. This is the point I realized I made another serious miscalculation. The light source I was using had a very large switch that wouldn't fit through the square pipe. So at the very last minute, I took a cutting disk and removed half of the backside of the square pipe. I cleaned up my cuts, installed the light, and then used black tape to hide my cut. It was all I could do with so little time left to finish this project. I definitely learned a lot from this project.
Based on the relief work done by other artists such as Wim Delvoye, I attempted to recreate this effect by layering the petals of the flower. The main obstacle for this piece was managing the massive weight that was rapidly accumulating on top. That's when I devised the large petal base and leaf counter weight. For the stem of the flower, I bent a long hollow square pipe into an "s" shape. This is the point I realized I made another serious miscalculation. The light source I was using had a very large switch that wouldn't fit through the square pipe. So at the very last minute, I took a cutting disk and removed half of the backside of the square pipe. I cleaned up my cuts, installed the light, and then used black tape to hide my cut. It was all I could do with so little time left to finish this project. I definitely learned a lot from this project.

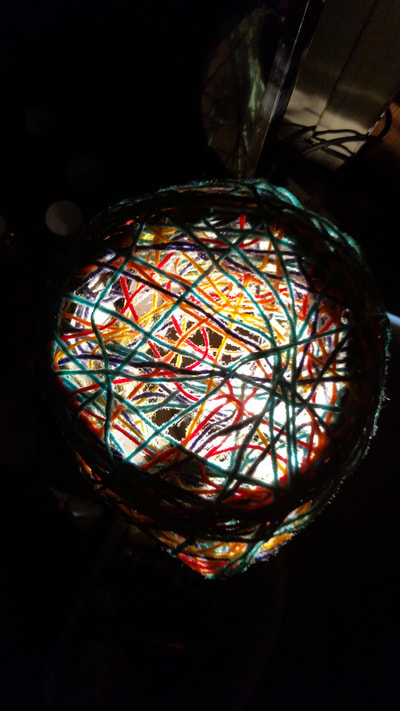
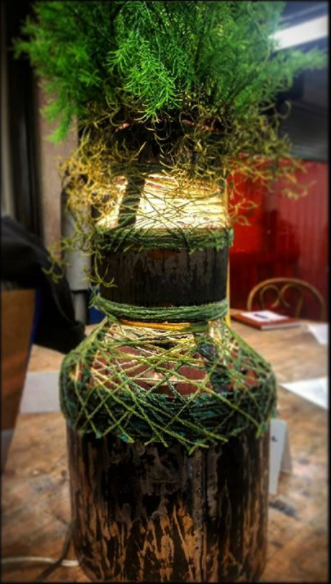
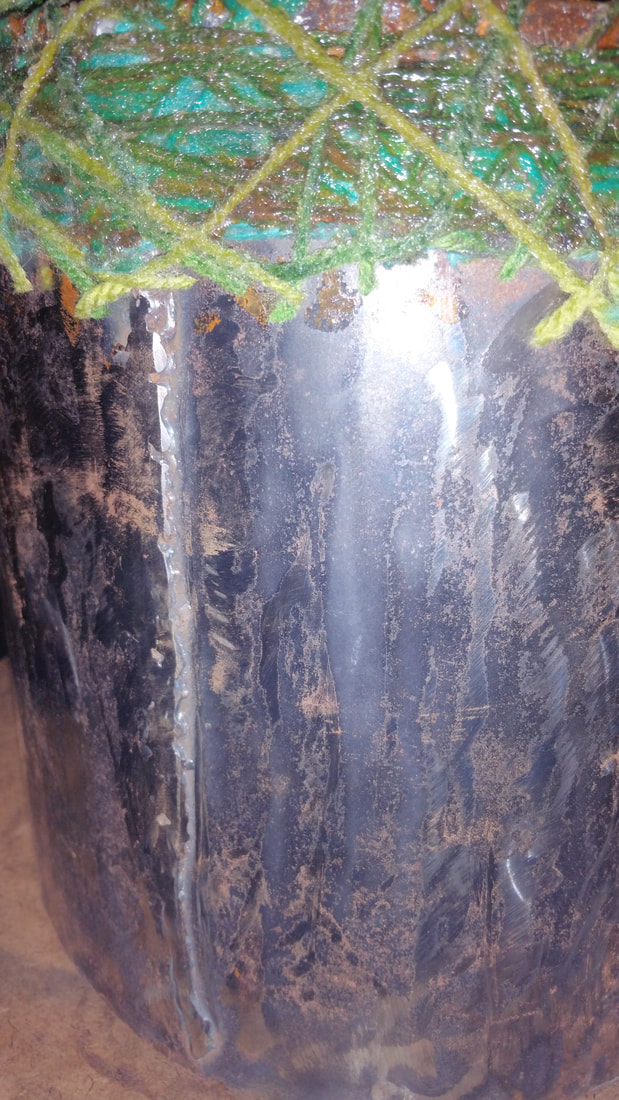
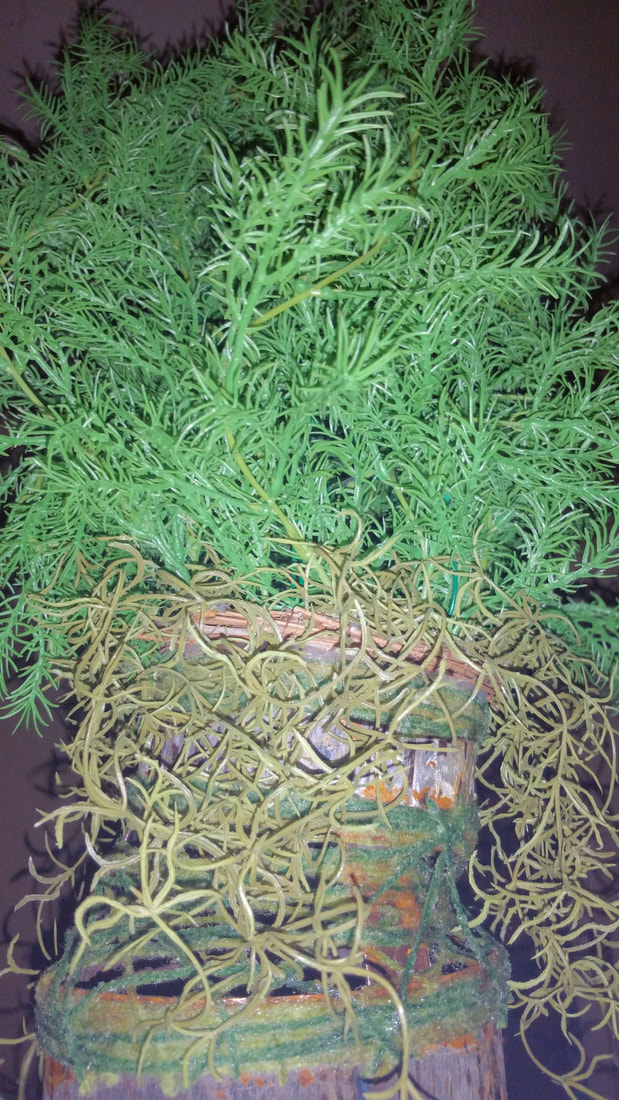
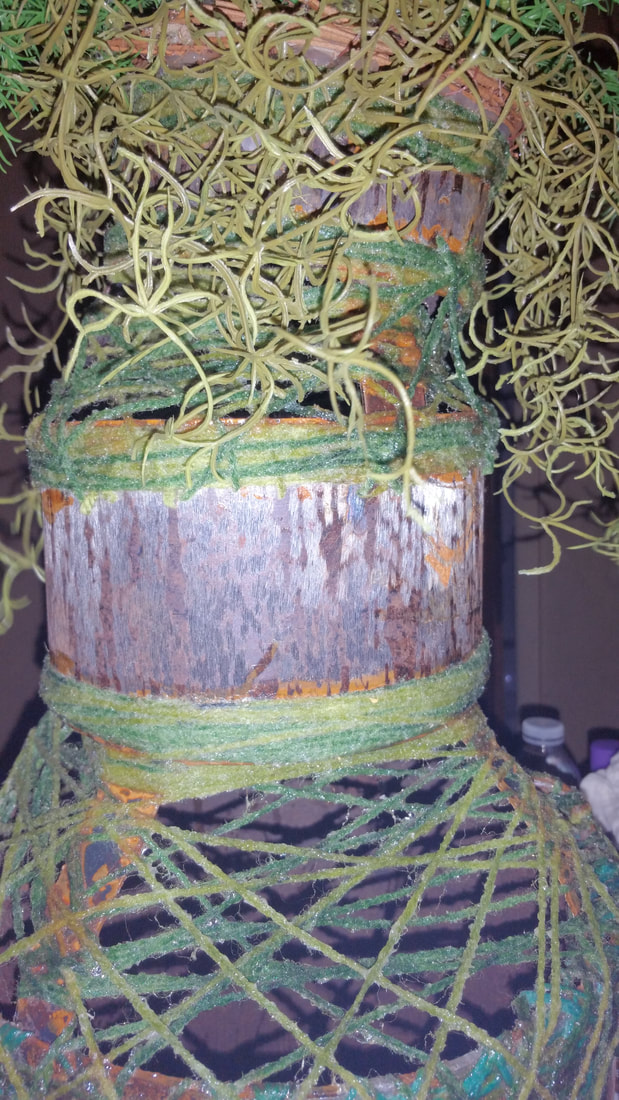
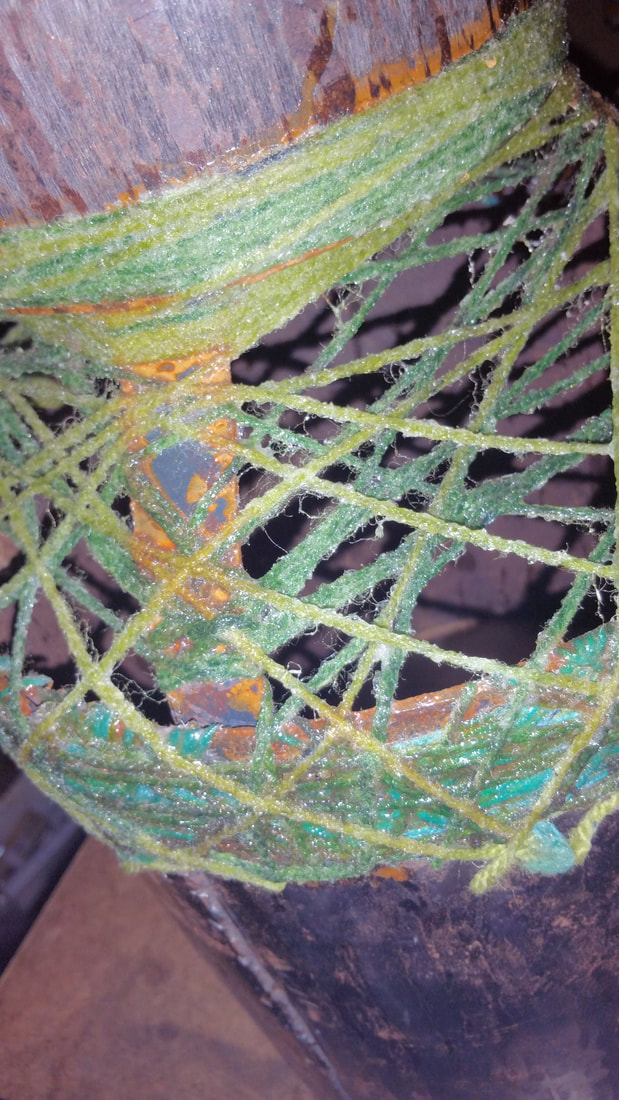
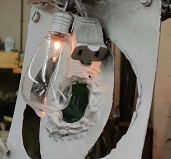
Sculpture Project 2 Nature Inspired- "Let There Be Life"
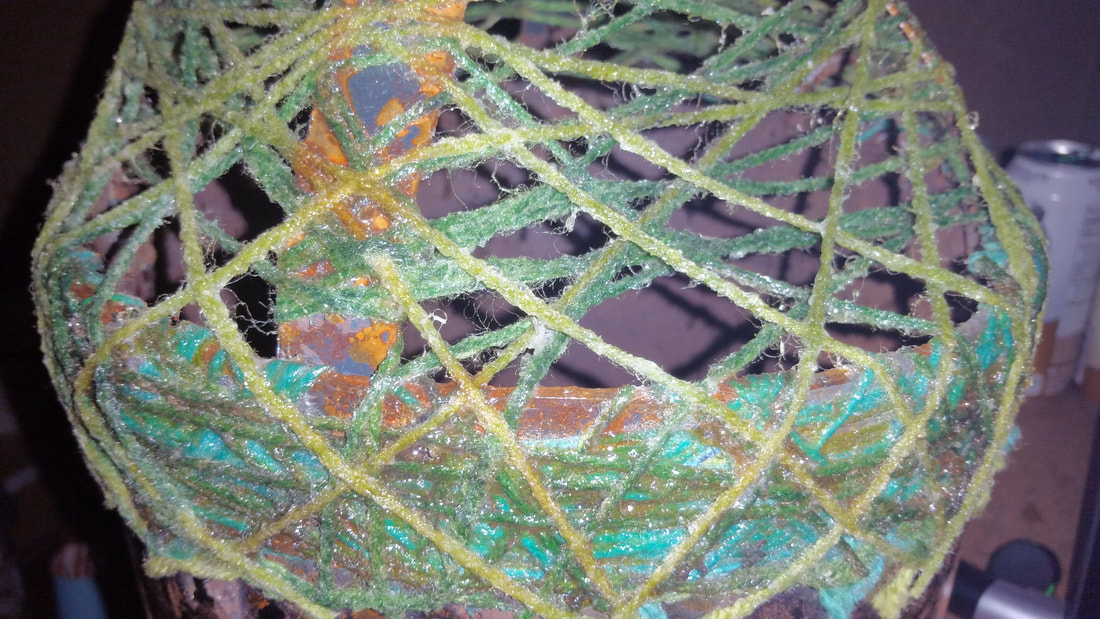
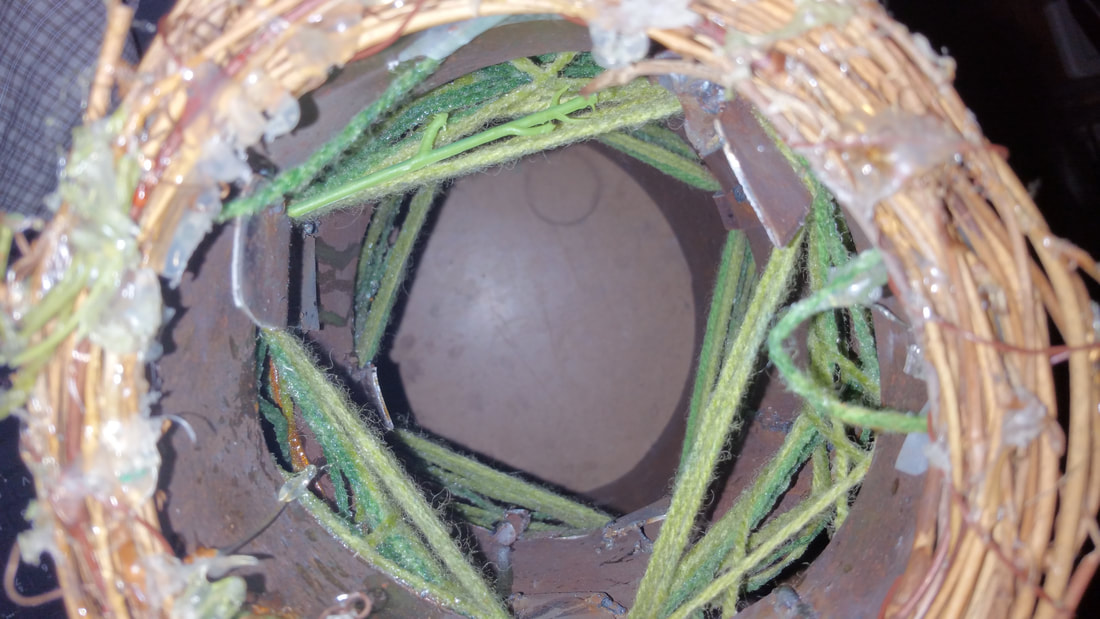
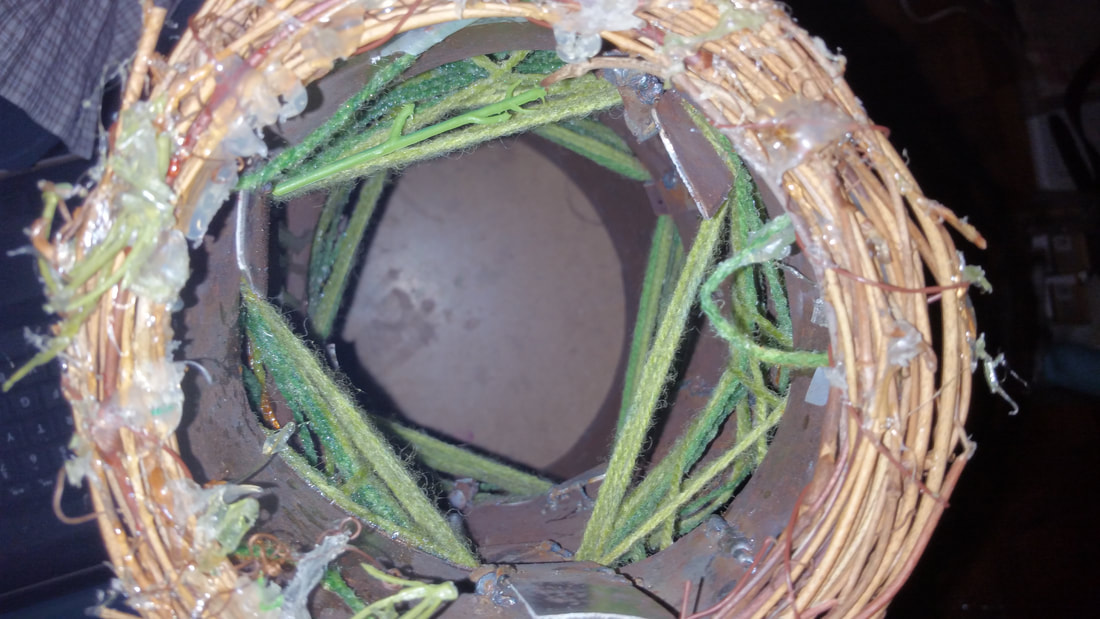
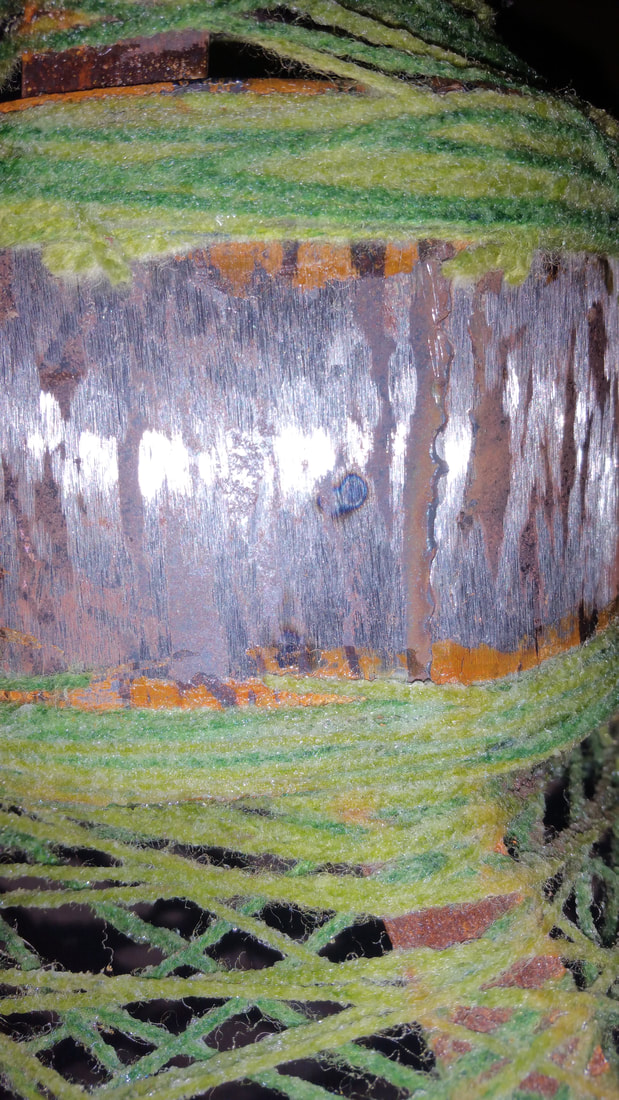
When I first brainstormed ideas for a nature inspired project, that used repeating shapes, I thought about the rings of a tree immediately. Then my professor Leticia Bajuyo mentioned to the class how tired she was of seeing trees. So that's when I knew I was making a tree.
The steel portions represent the tree rings, the petrified yarn represents growth, and the light represents life.
If I were to redo this again, I wouldn't have added the faux foliage. The inside of the sculpture has an interesting pattern that I wish I would have left visible as a hidden gem.


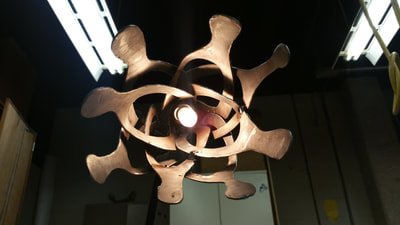
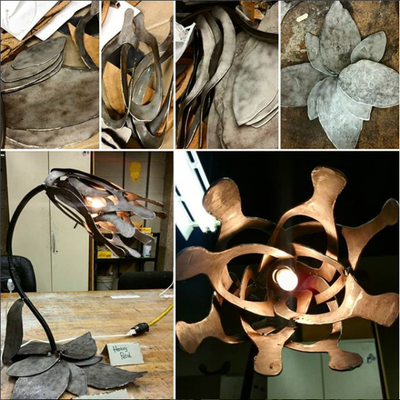
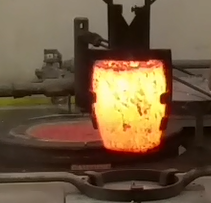
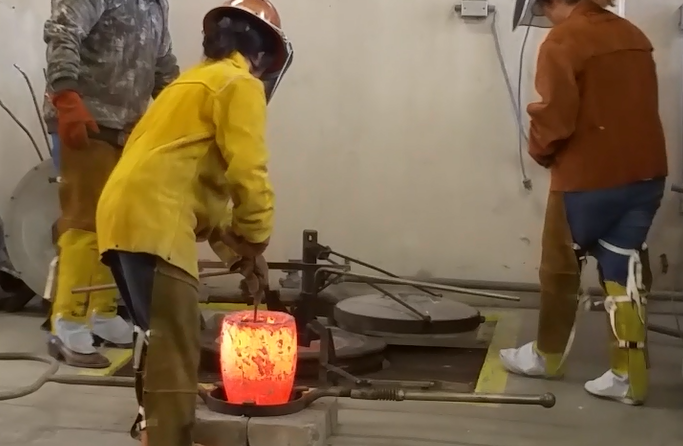
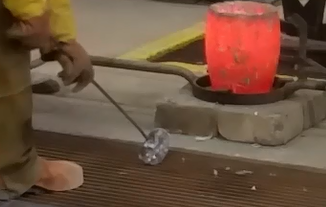
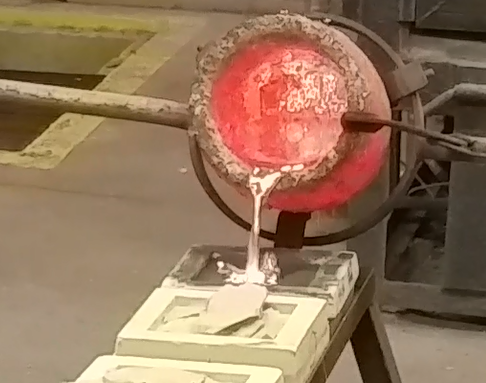
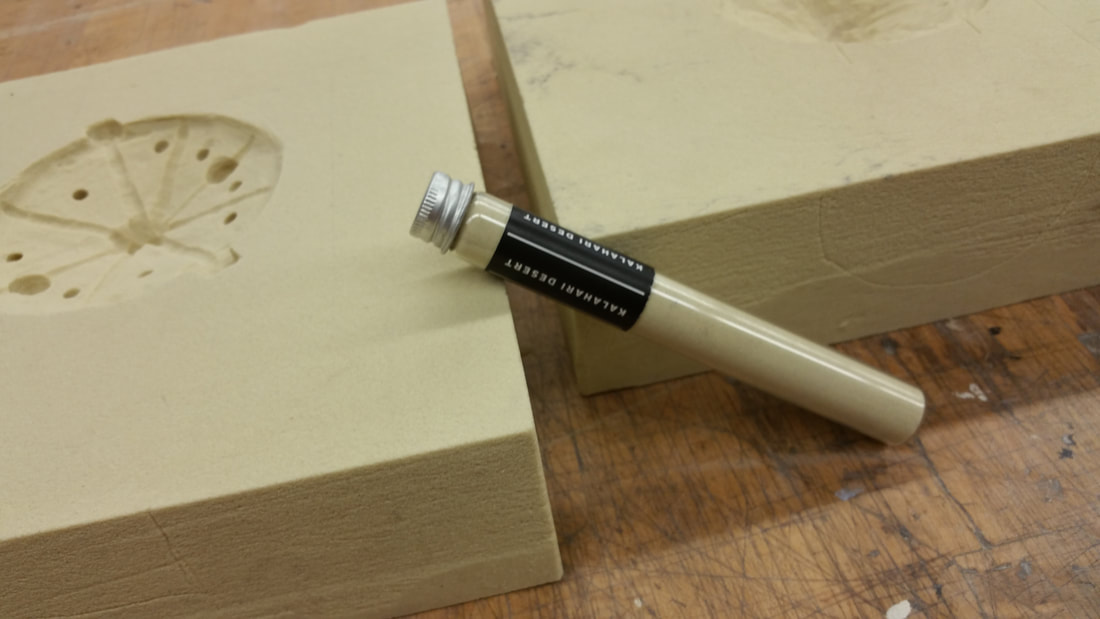
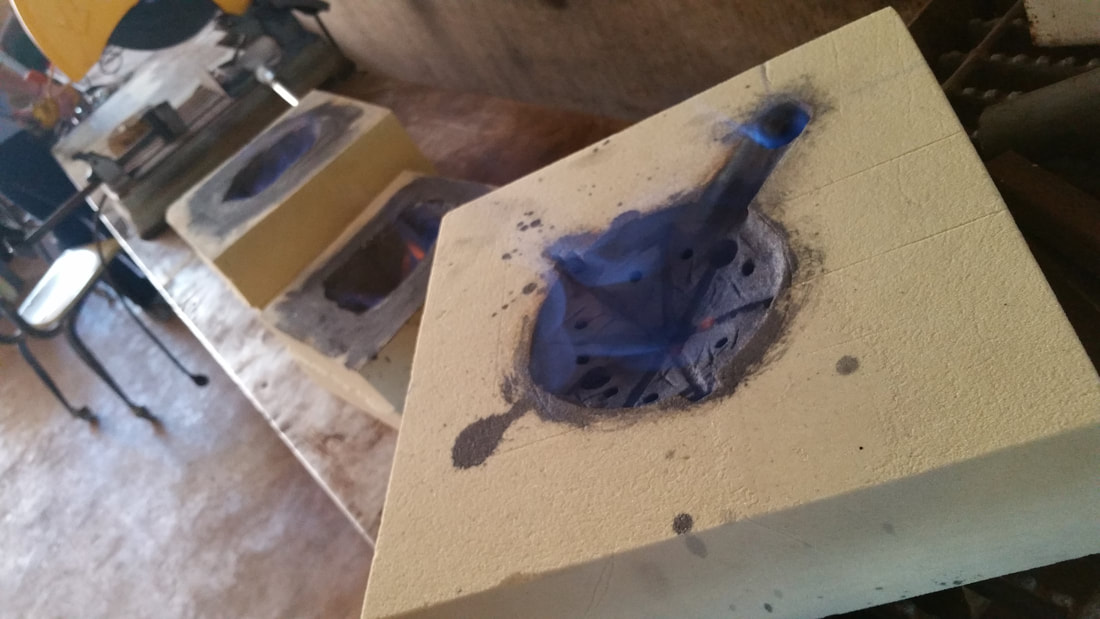
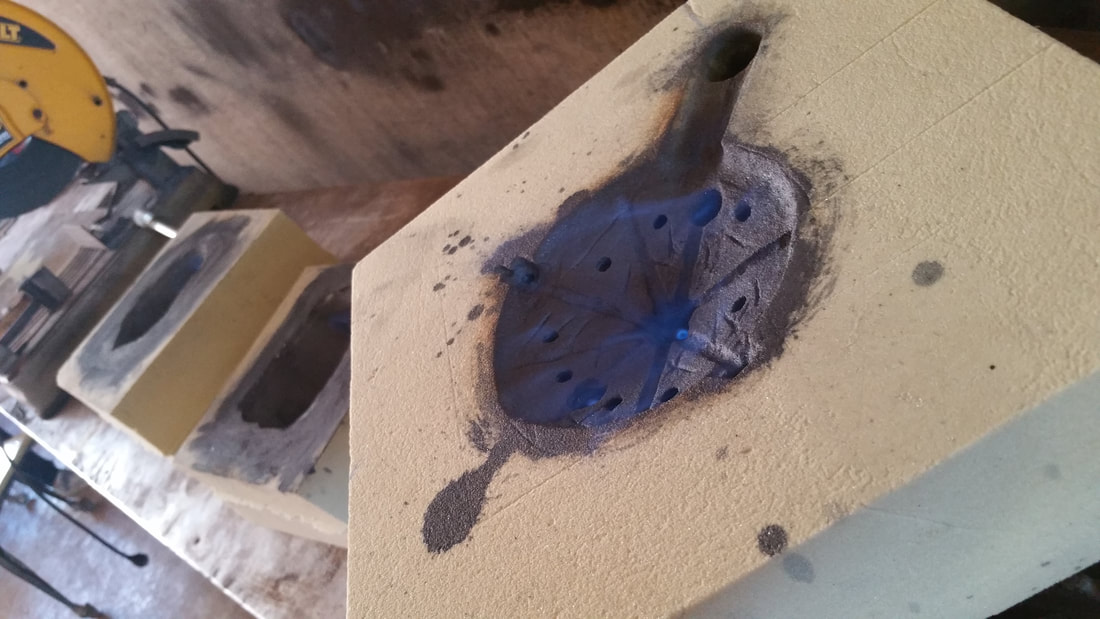
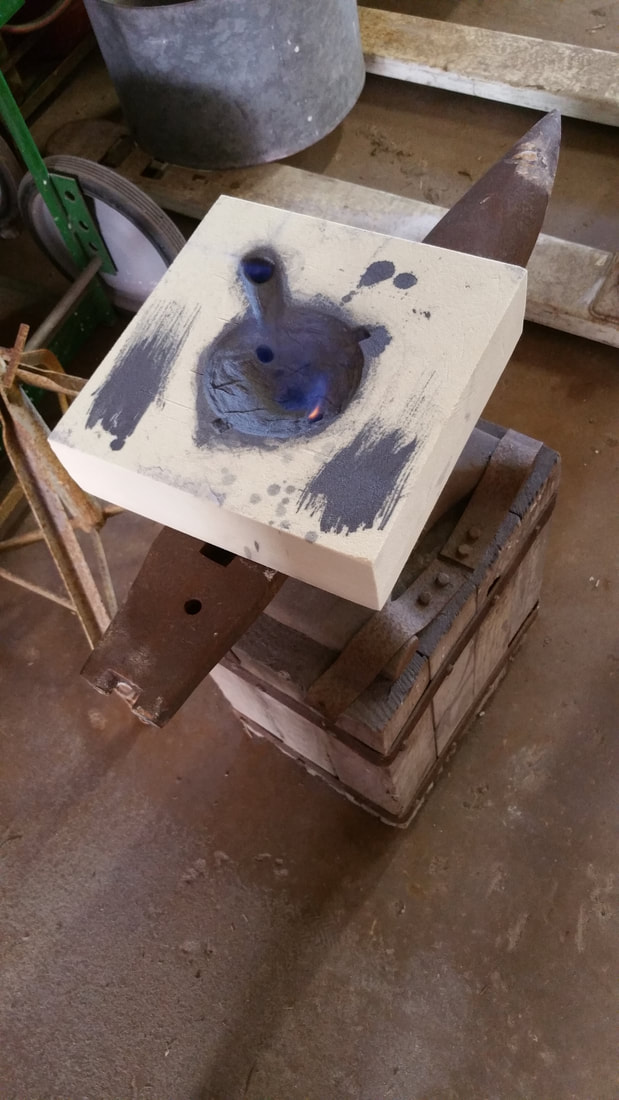
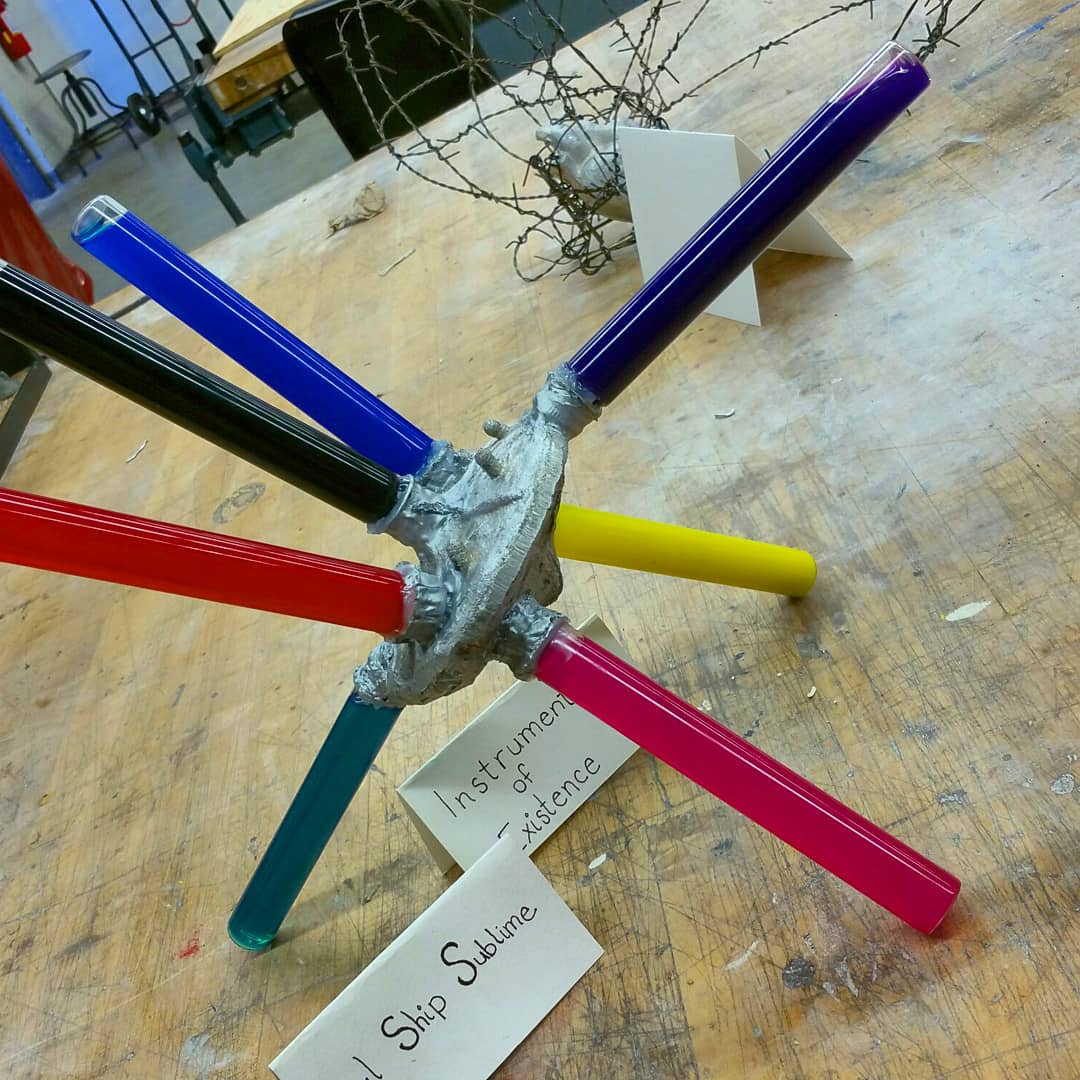
Sculpture Project 3 Mechanic Organic Inspired- "Soul Ship Sublime"
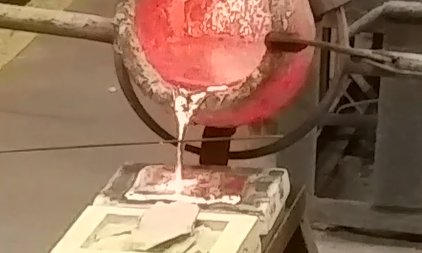
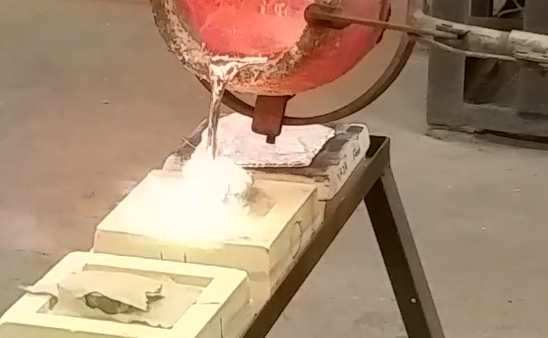
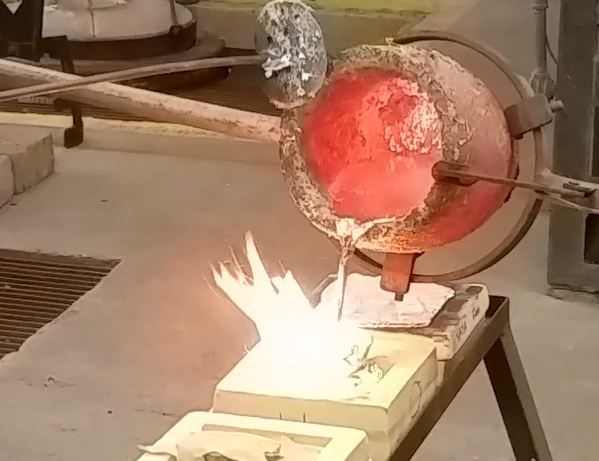
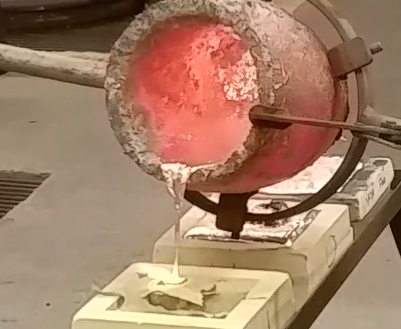
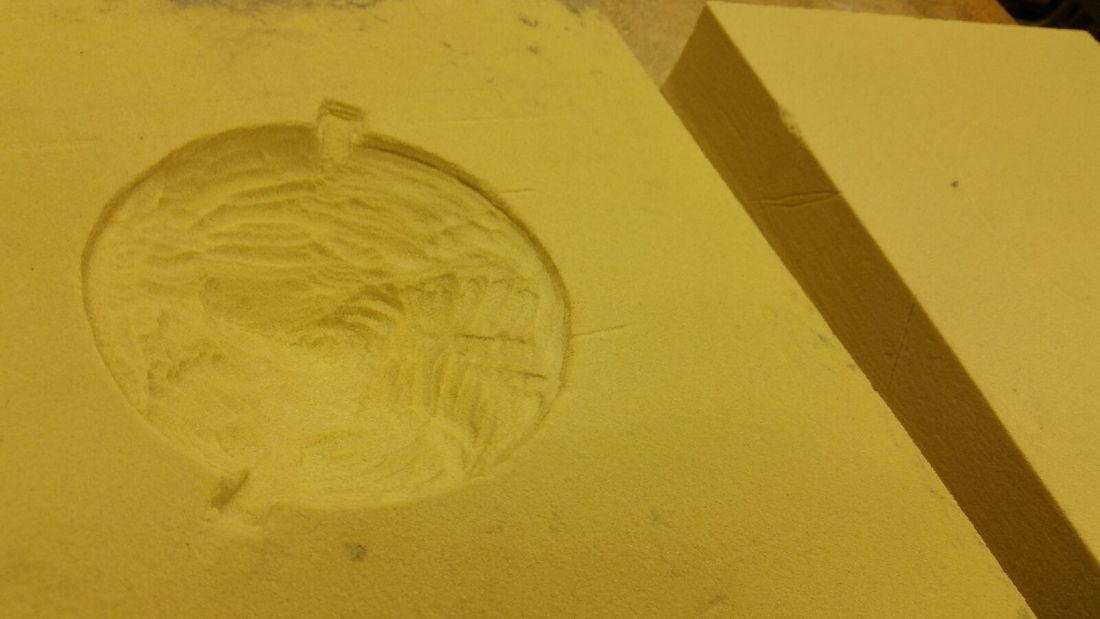
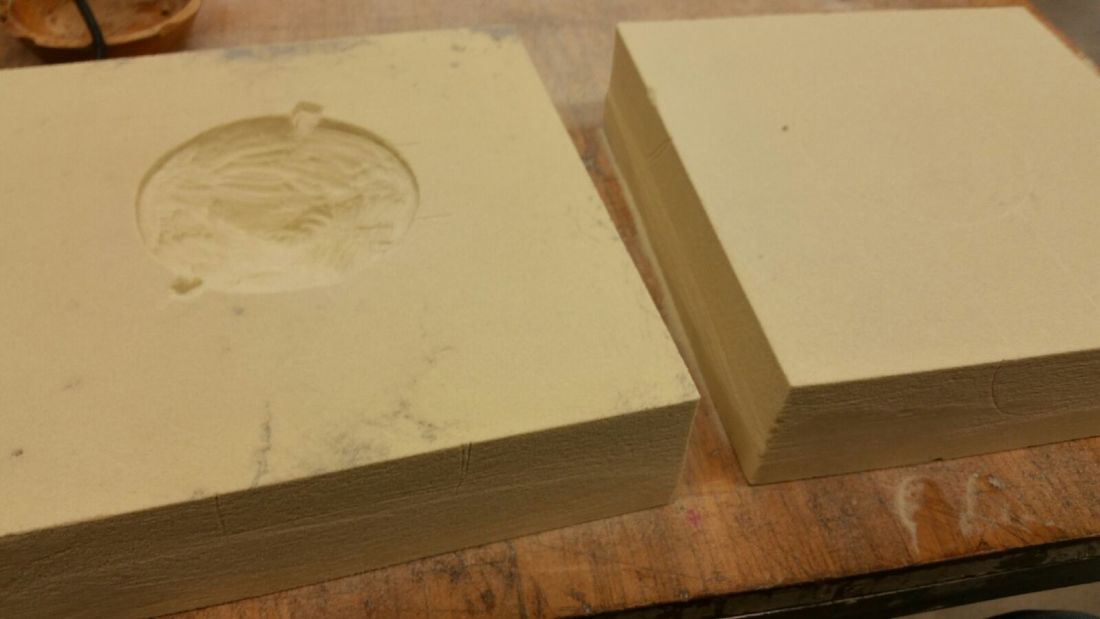
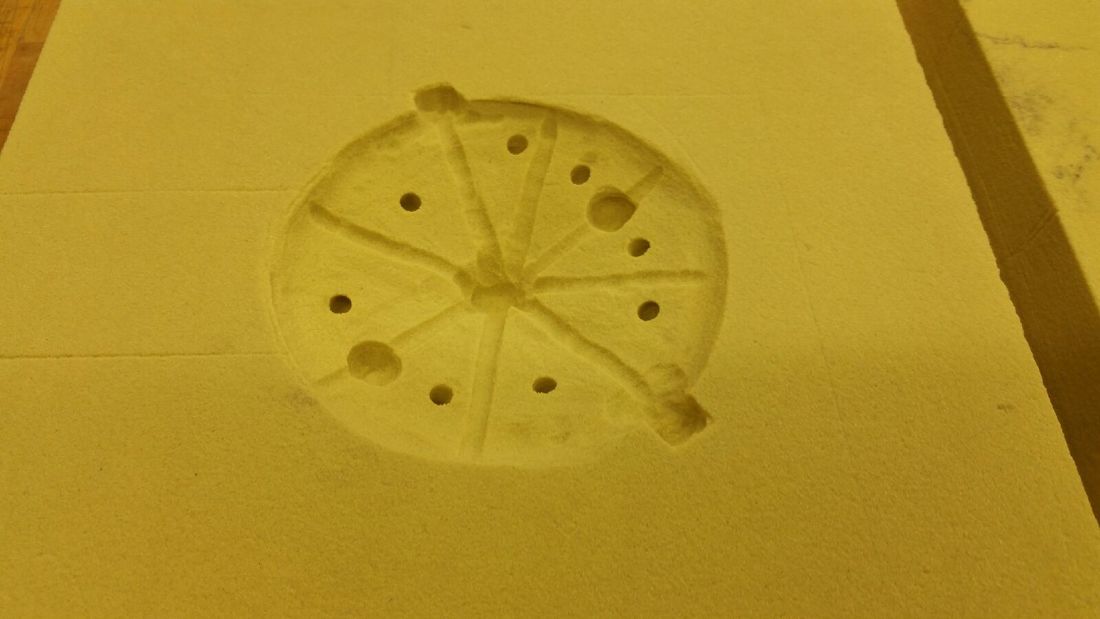
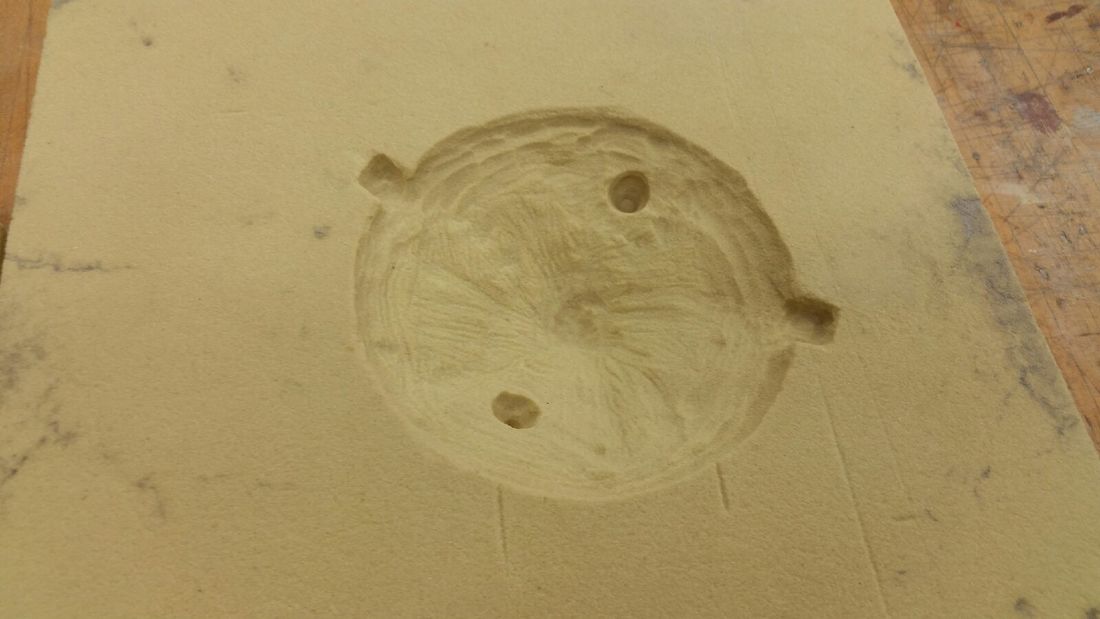
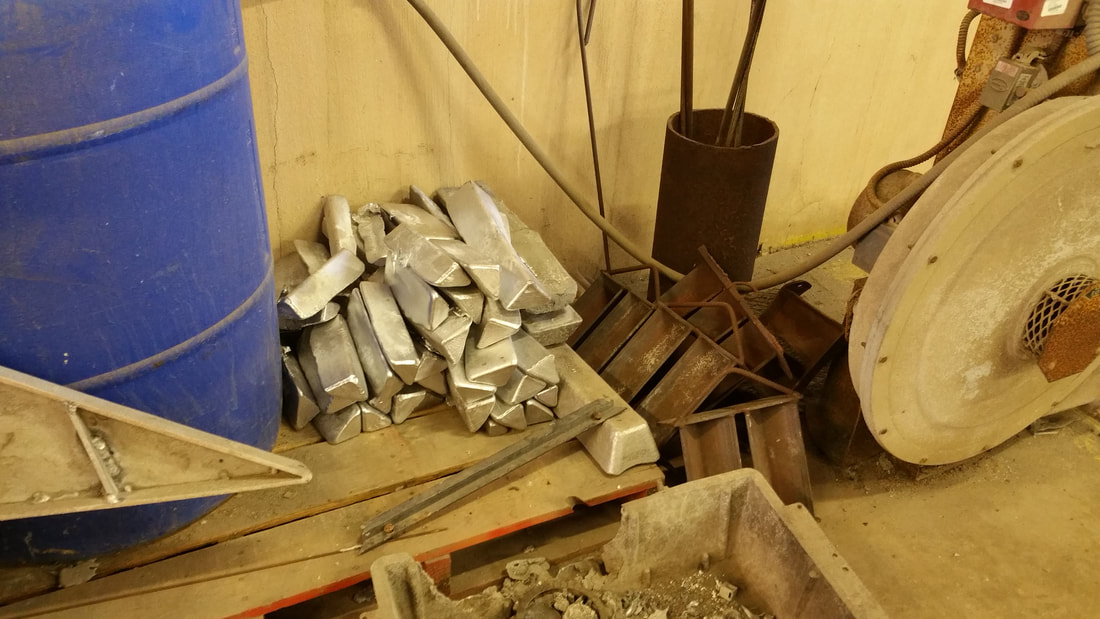
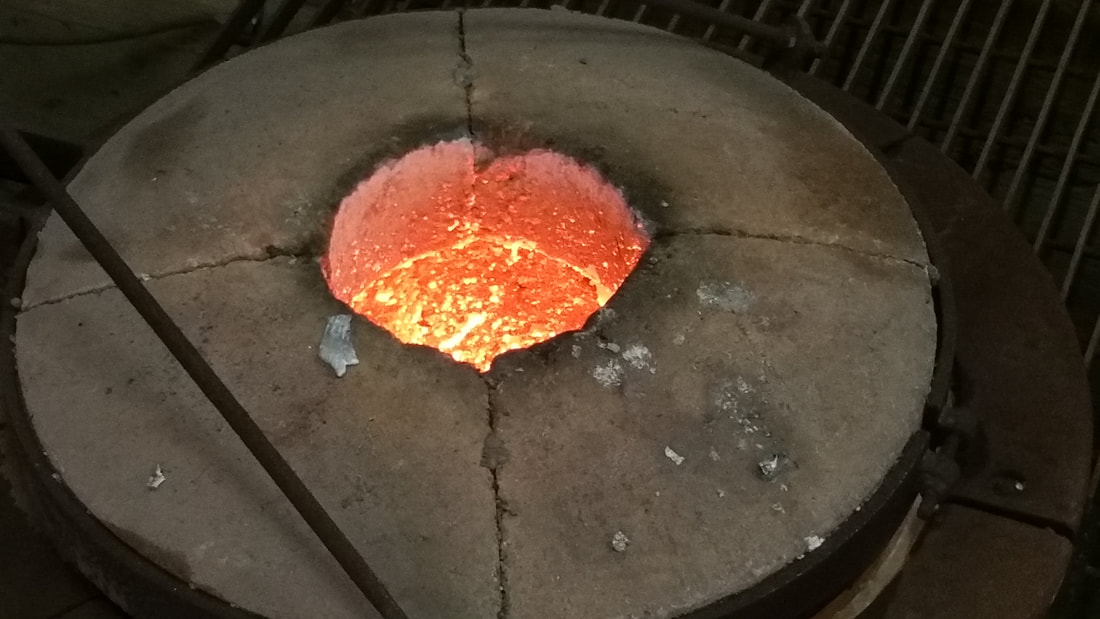
This entire project was centered around our learning how to do a sand-resin mold and aluminum pour. This wasn't my first time trying this, but it certainly has been a long while. Here are a few shots from one of the many pours.
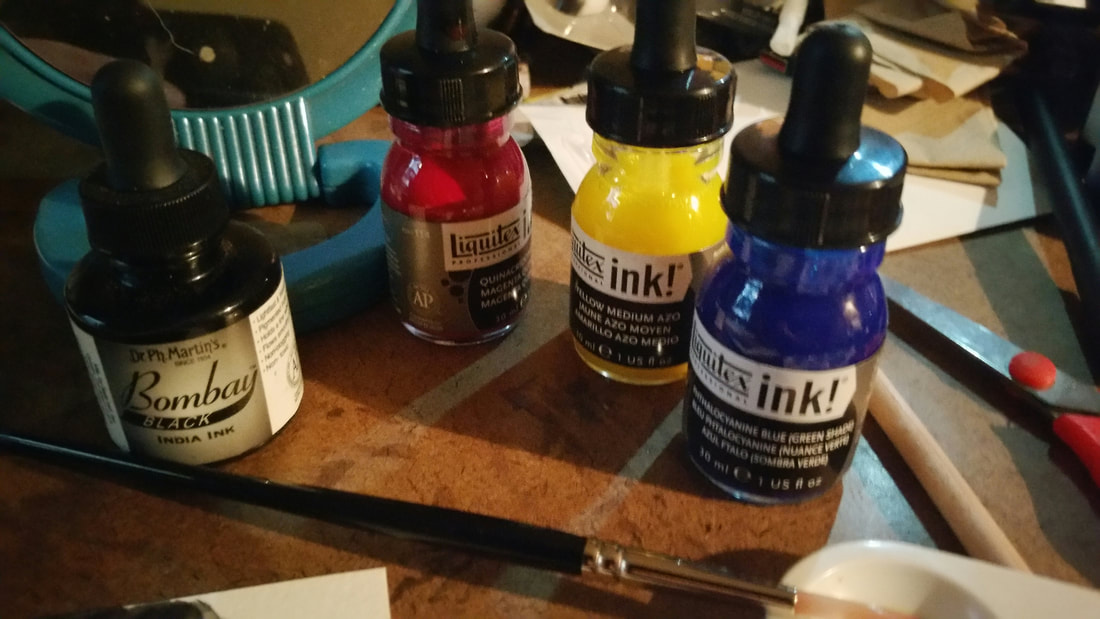
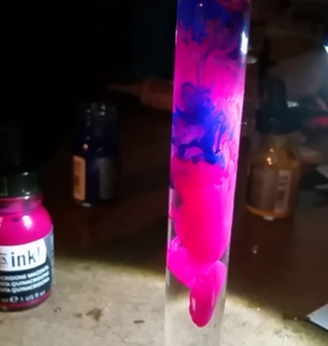
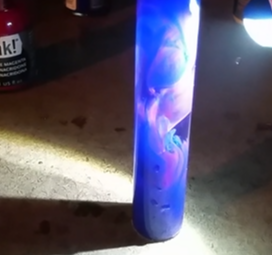
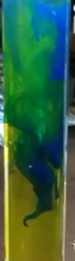
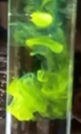
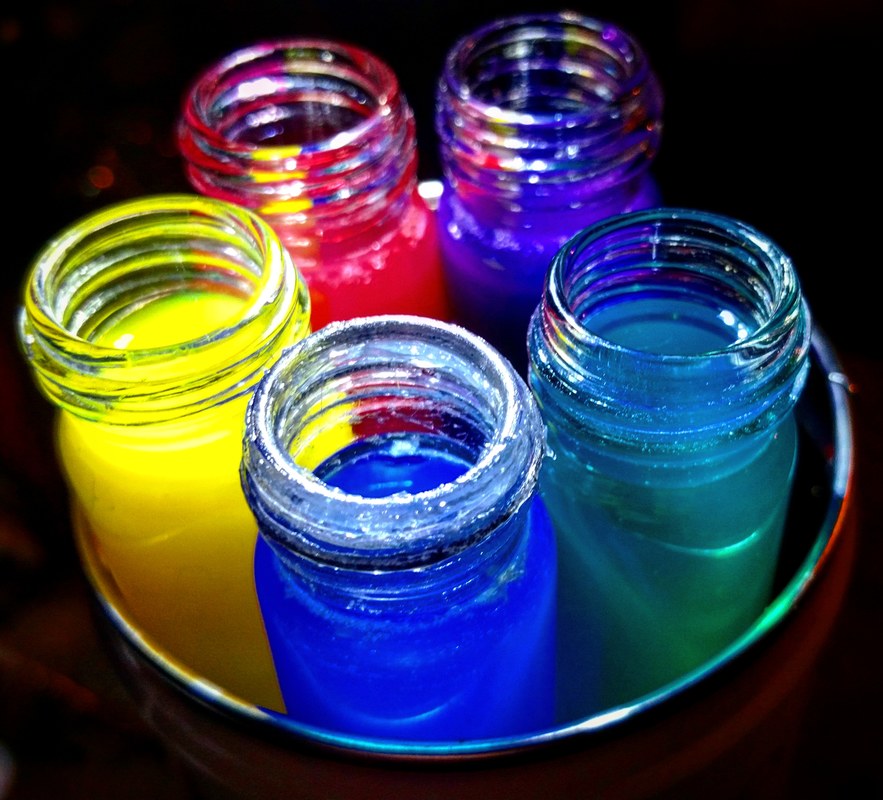
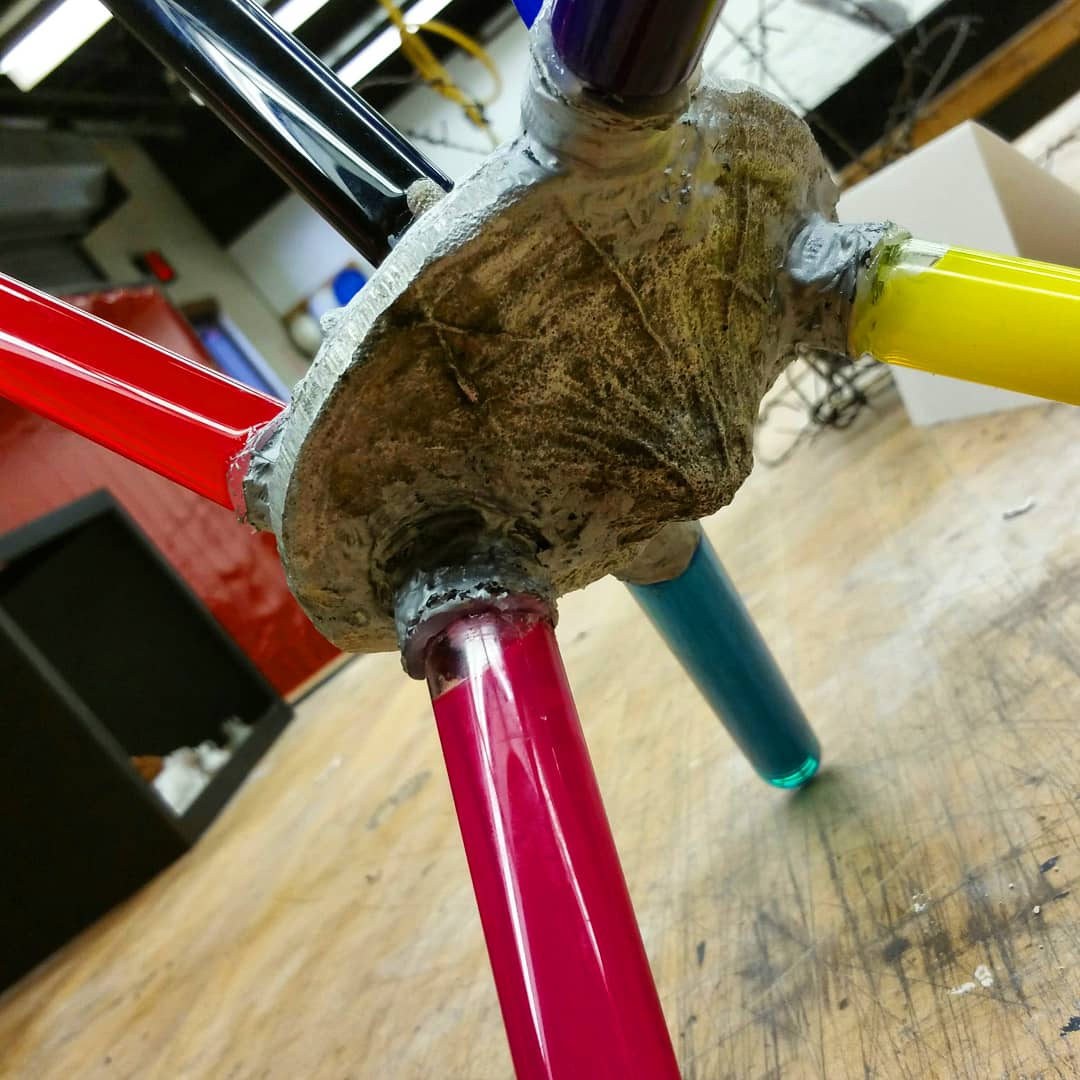
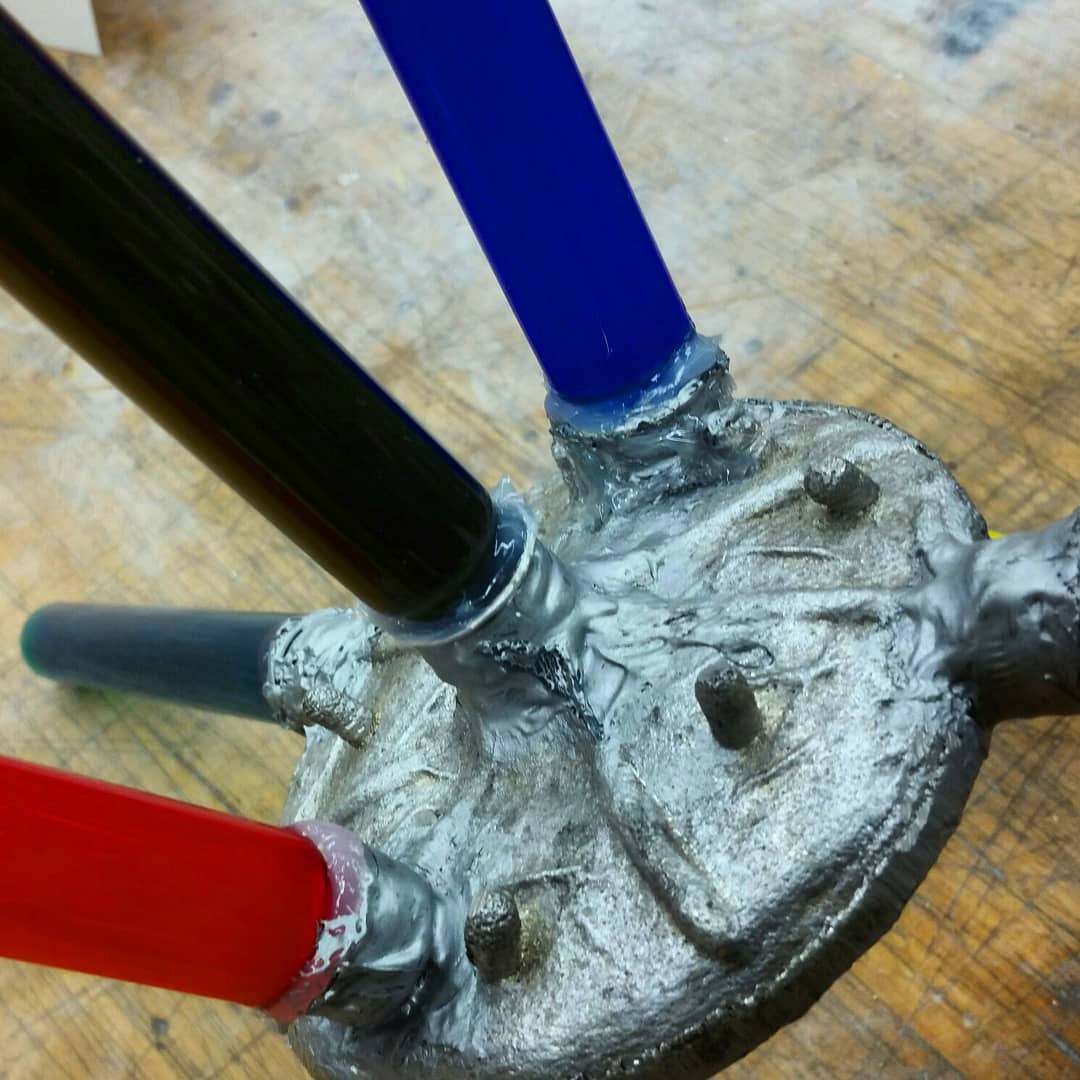
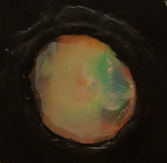
When I started this project I did not really have a plan. What I had was seven glass salt containers, in the shape of test tubes, that I was determined to use. Originally I planned to place different things into the tubes such as grass, salt/fresh water, and sand. But after playing around with ink in another class, I decided to portray those different elements as colored liquid instead. The shape of my aluminum piece was designed specifically around my desire to use these tubes.
I designed the top of the ship to look weathered like ship has been traveling through space for a while. The bottom in contrast, was meant to look significantly more beat up. This was meant to convey that life on the ship was not always easy. Also, the ability to rearrange the ship into almost any position is a plus. The ship is built with an internal gyroscope that prevents any shuffling of the passengers while the ship is in motion. So there is no need to worry about the passengers. The ink/water mixture inside the cylinders were meant to symbolize the different things the inhabitants would need to survive on board the ship. Green obviously symbolized their vegetation, yellow was light, blue was hydration, purple was science, pink was love, red was for warmth, and black for waste disposal. I also made it a point to not completely fill each tube. I wanted there to be a movement in each color. One of my favorite elements of this sculpture is that each tube has the exact same sized air bubble. It makes for a pretty cool effect when they all move in unison.
If I were to redo this project, I would have spent more time ensuring the lids from the glass tubes fit onto the mold by measuring out those relief sections more carefully. I had an extremely hard time attaching each of the glass tubes to the aluminum. First, I tried using hot glue. But I quickly learned that wasn't going to work. The weak adhesive couldn't support the weight. Second, I tried silicone. That created a decent seal holding in the water, but it also wasn't strong enough to support the weight of the entire sculpture. Finally, I used JB weld and silicone together to get finally achieve everything I wanted. I then used a silver metallic paint to cover the liquid weld. I'm not completely satisfied with the excess silicone around the area where the glass
meets the weld. In my head, I can justify it as condensation that has frozen over due to the vacuum of space. But from a design standpoint, it looks distracting. Knowing what I know now, I think I could attach them in a cleaner way. All the trouble aside, I'm really happy with how the
'Soul Ship Sublime' came out!


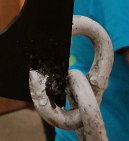
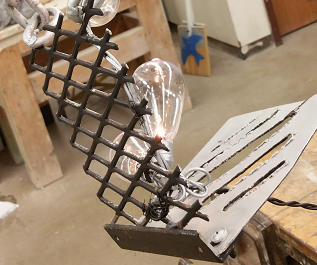
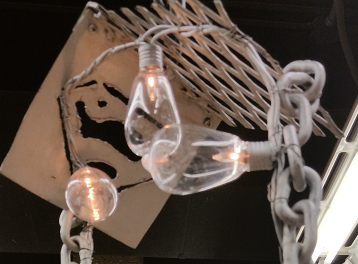
Sculpture Project 4 Remix project- "Not Pier 1"
For this project, we were tasked with remixing one of our previous projects. I chose to remix the entire semester. I wanted this piece to have a ton of different elements, be lighted, cast a cool shadow, and to be a little chaotic.
-I started out by cutting squared pieces of steel and grating. I then drilled holes into them, and attached them with a corner bracket.
-Then I clamped those pieces down, and cut designs into them with the plasma cutter.
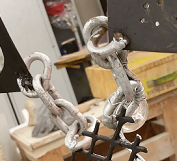
-I then took my chain and cut it up into enough pieces to connect my steel corners.
-Next, I welded everything together.
-Once that was done, I attached the glass holographic eye using JB weld. I waited about an hour for it so get a sturdy enough top crust for paint.
-Finally, I painted everything. I chose to go two-tone because or the variety it gives to the viewer depending on how you look at it.
-I started out by cutting squared pieces of steel and grating. I then drilled holes into them, and attached them with a corner bracket.
-Then I clamped those pieces down, and cut designs into them with the plasma cutter.
-I then took my chain and cut it up into enough pieces to connect my steel corners.
-Next, I welded everything together.
-Once that was done, I attached the glass holographic eye using JB weld. I waited about an hour for it so get a sturdy enough top crust for paint.
-Finally, I painted everything. I chose to go two-tone because or the variety it gives to the viewer depending on how you look at it.
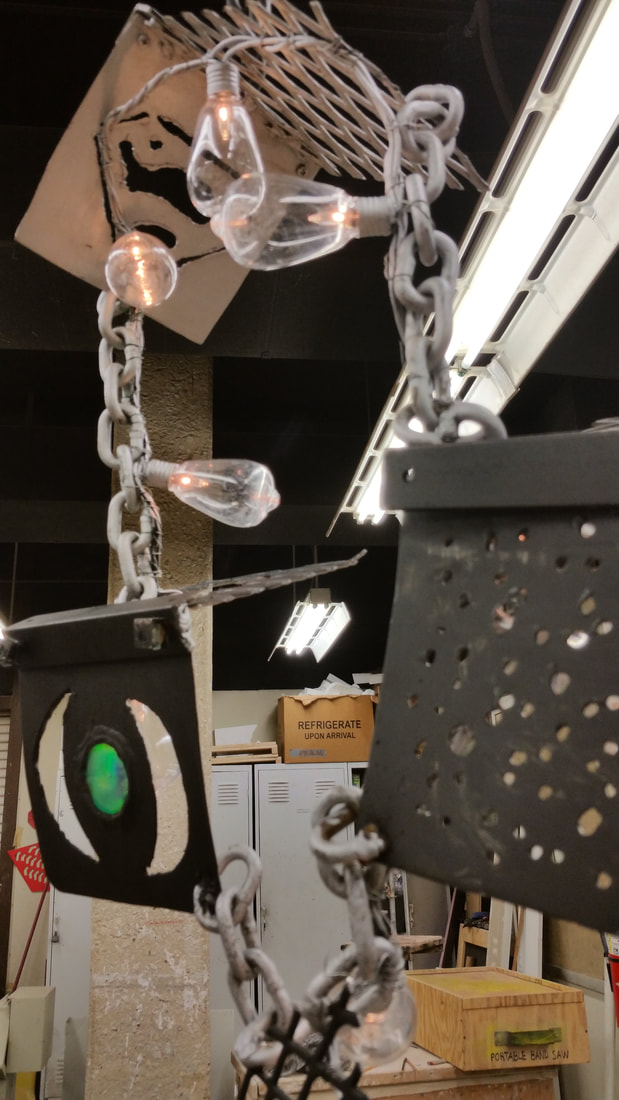

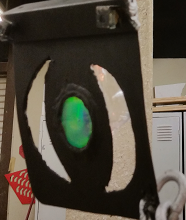
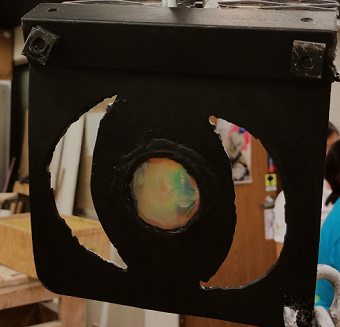
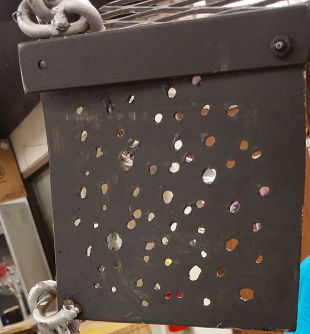
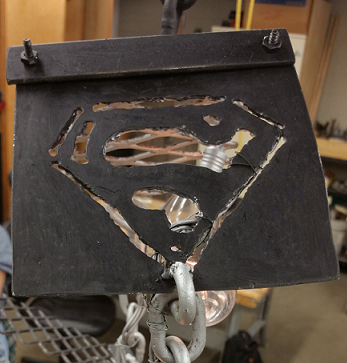
Going in to this project, I had no idea how it was going to come out. I just kept trying to add every crazy idea I was getting. There are a few things I really like about how this came out, especially the negative space present in the center of the circle.
